项目中,甲方对服务器做安全扫描,发现存在较多 MySQL 低版本漏洞,并要求修复。但考虑到业务的影响,不方便直接对当前版本做升级,且我们业务部署在内网环境,也做了网络访问限制,因此实际安全隐患较小。这里尝试寻找其他的方法进行规避,即修改 MySQL 的版本号,隐藏其真实的版本信息。 测试过程记录如下,风险操作,仅供参考。
探测MySQL/MariaDB版本信息
查看当前版本的方法有很多,常见的有:
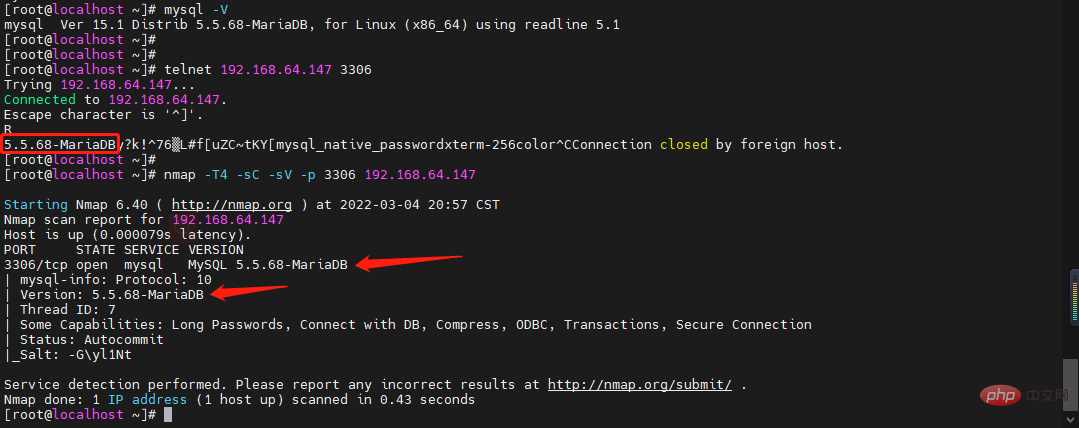
服务器上执行 mysql -V
登录mysql,使用sql语句查询
mysql -uroot -p> select version();
登录后复制
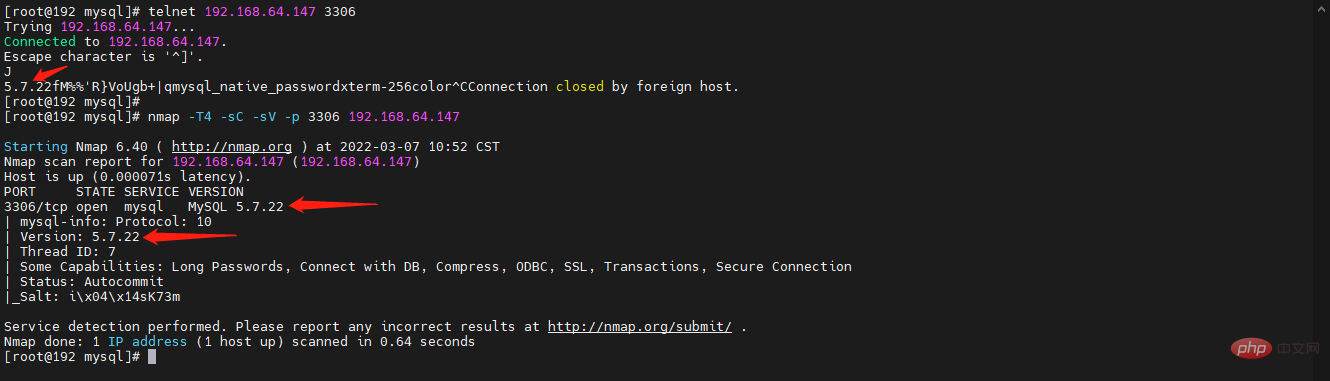
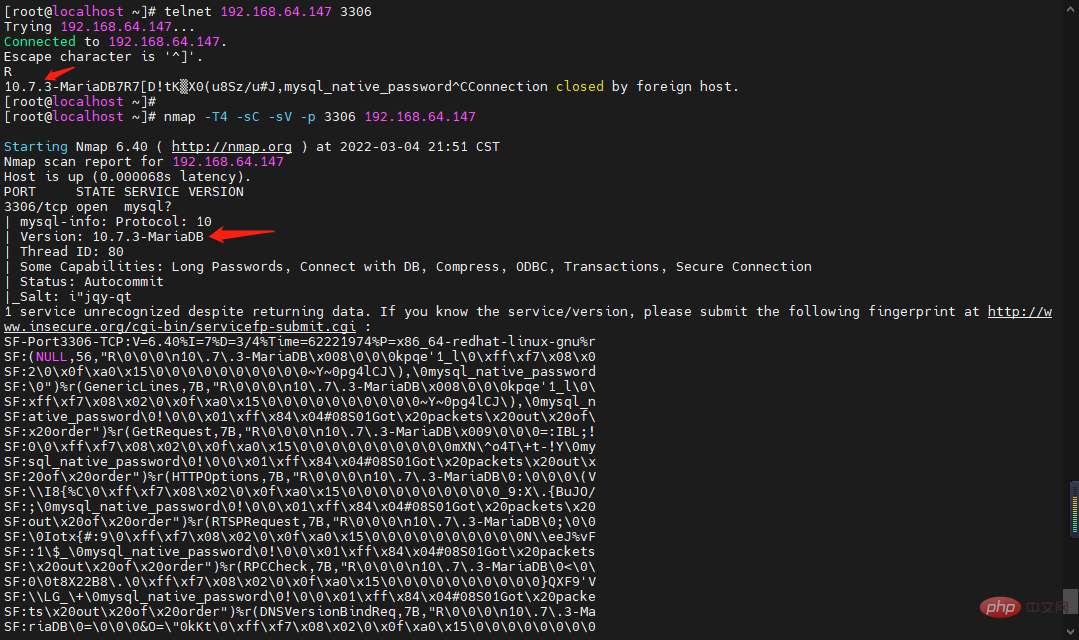
没有登录权限的情况下,还可以使用 telnet 或 nmap 工具进行探测扫描,得到 mysql 的版本信息:
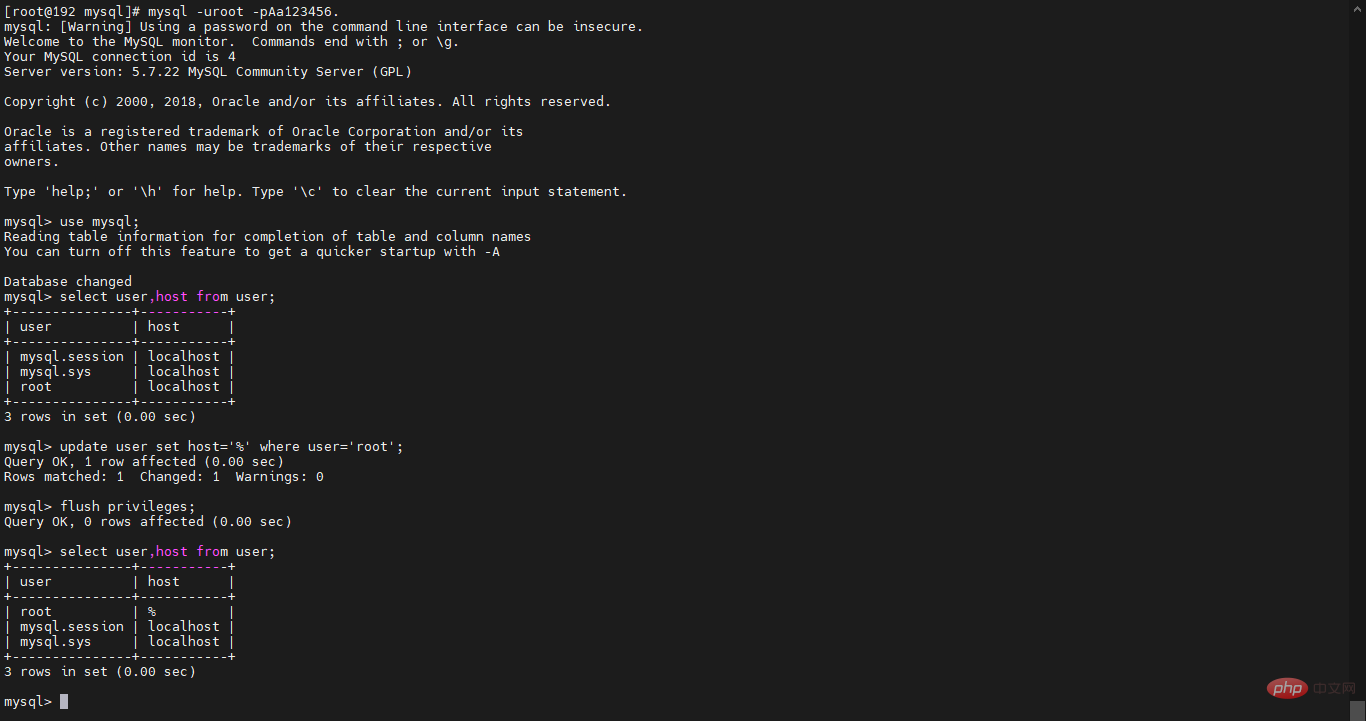
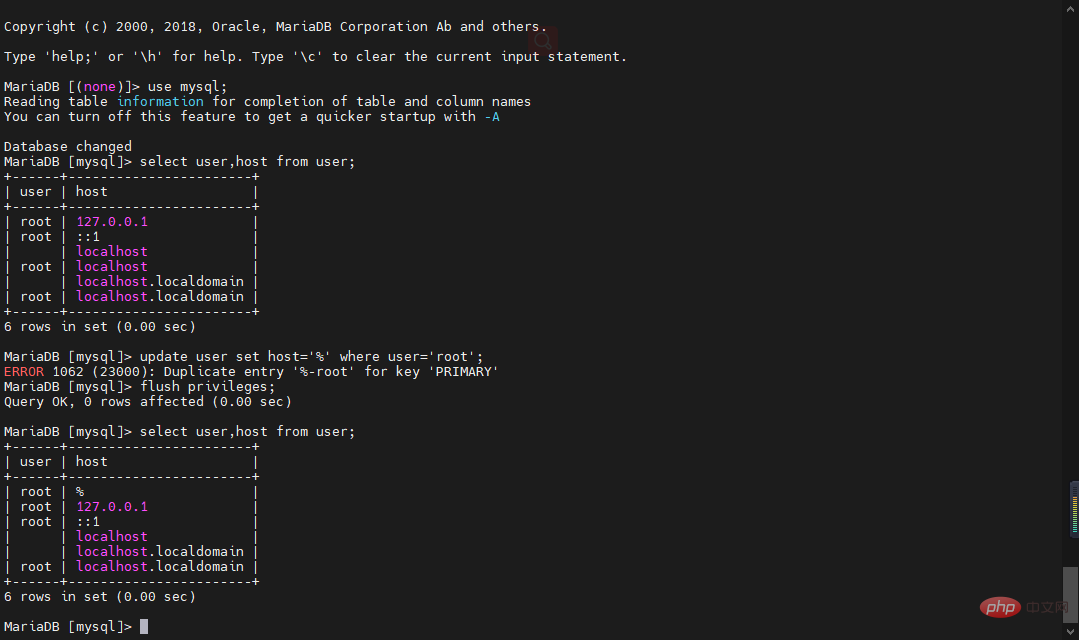
mysql -uroot -pAa123456.
mysql> use mysql;mysql> select user,host from user;mysql> update user set host='%' where user='root';mysql> flush privileges;mysql> select user,host from user;
2. 编辑二进制文件,替换其中的版本信息 如果只想对外部探测 MySQL 的真实版本信息进行隐藏,只需改 /usr/sbin/mysqld 文件。 ??????注意:版本号不可为空或删减其他信息,否则可能导致服务无法启用!
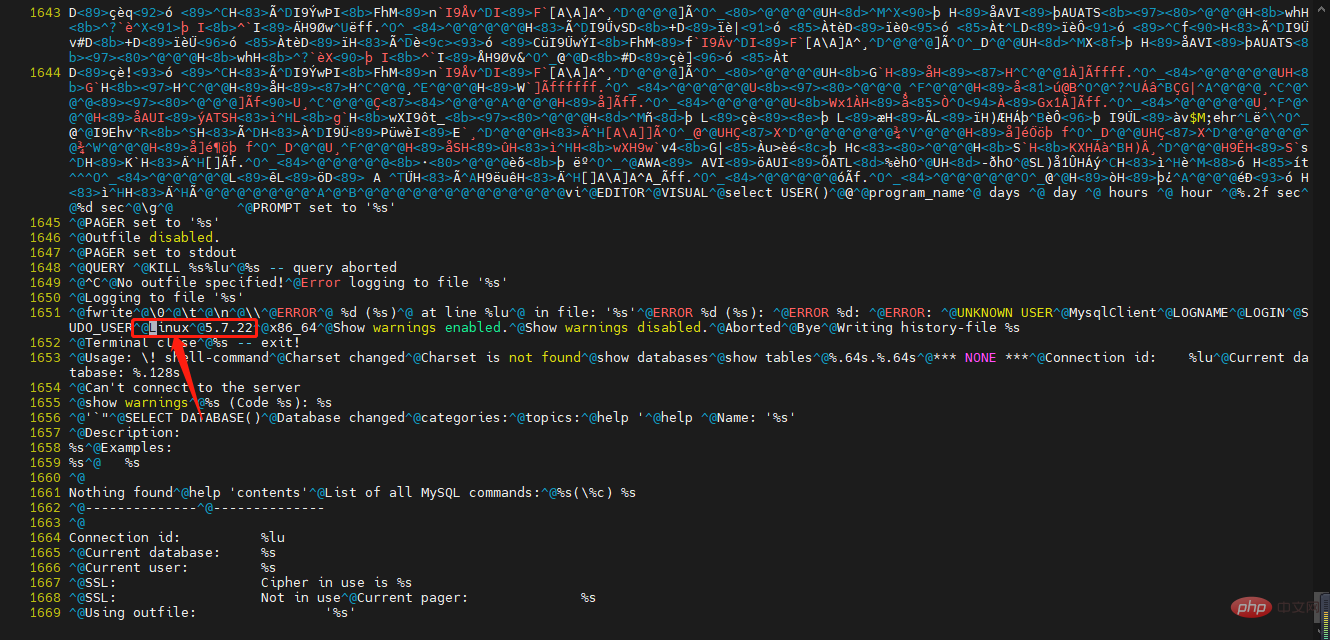
vi /usr/bin/mysql# 搜索关键字“Linux”快速定位,修改版本号,建议改为官网最新的稳定版本^@fwrite^@\0^@\t^@\n^@\\^@ERROR^@ %d (%s)^@ at line %lu^@ in file: '%s'^@ERROR %d (%s): ^@ERROR %d: ^@ERROR: ^@UNKNOWN USER^@MysqlClient^@LOGNAME^@LOGIN^@SUDO_USER^@Linux^@5.7.22^@x86_64^@Show warnings enabled.^@Show warnings disabled.^@Aborted^@Bye^@Writing history-file %s# 参考案例:^@fwrite^@\0^@\t^@\n^@\\^@ERROR^@ %d (%s)^@ at line %lu^@ in file: '%s'^@ERROR %d (%s): ^@ERROR %d: ^@ERROR: ^@UNKNOWN USER^@MysqlClient^@LOGNAME^@LOGIN^@SUDO_USER^@Linux^@5.7.37^@x86_64^@Show warnings enabled.^@Show warnings disabled.^@Aborted^@Bye^@Writing history-file %s
登录后复制
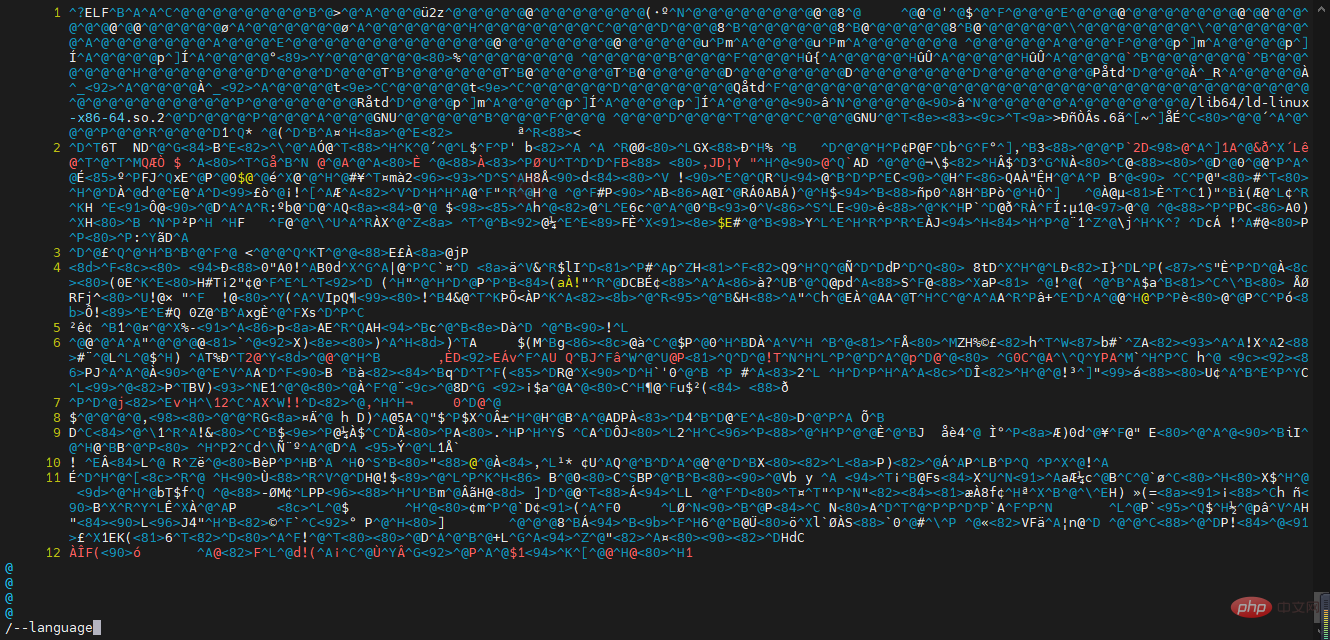
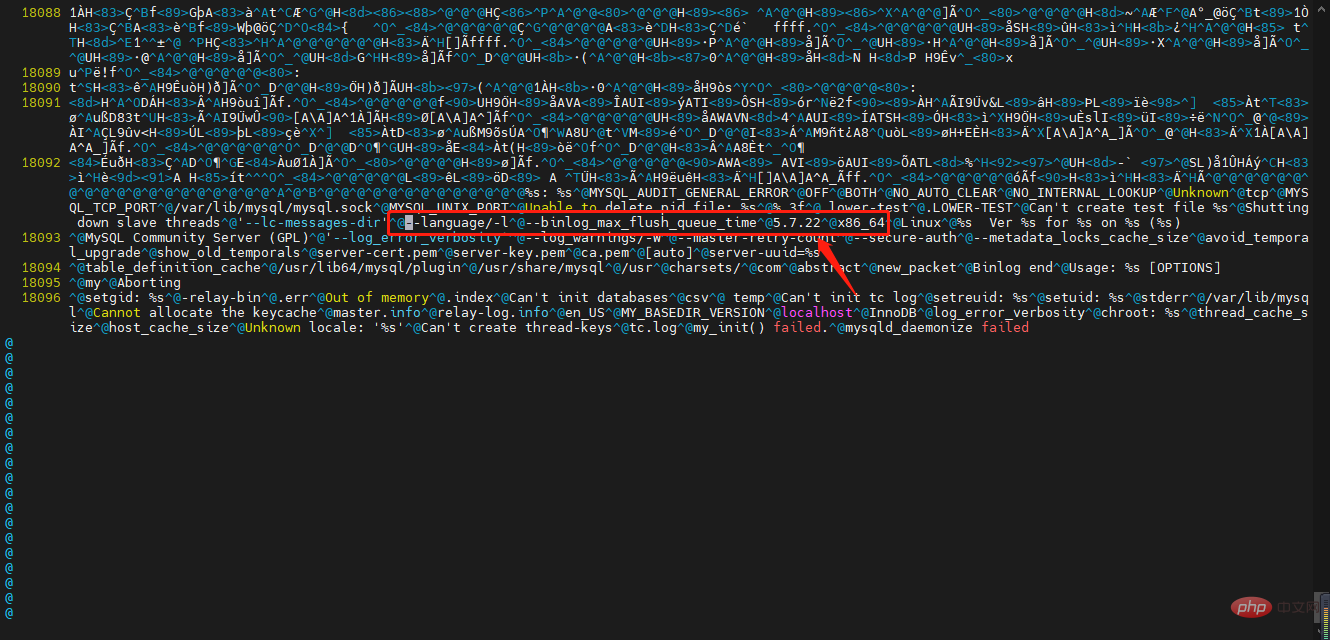
vi /usr/sbin/mysqld
# 搜索关键字“--language”快速定位,修改版本号,建议改为官网最新的稳定版本
H<8b>^P1?éz?,?1ò??^@^@H<83>ì^HH<83>?^H?^@^@^@^@^@^@^@^@^@^@^@^A^@^B^@^@^@^@^@^@^@^@^@^@^@^@^@%s: %s^@MYSQL_AUDIT_GENERAL_ERROR^@OFF^@BOTH^@NO_AUTO_CLEAR^@NO_INTERNAL_LOOKUP^@Unknown^@tcp^@MYSQL_TCP_PORT^@/var/lib/mysql/mysql.sock^@MYSQL_UNIX_PORT^@Unable to delete pid file: %s^@%.3f^@.lower-test^@.LOWER-TEST^@Can't create test file %s^@Shutting down slave threads^@'--lc-messages-dir'^@--language/-l^@--binlog_max_flush_queue_time^@5.7.22^@Linux^@%s Ver %s for %s on %s (%s)
# 参考案例:
H<8b>^P1?éz?,?1ò??^@^@H<83>ì^HH<83>?^H?^@^@^@^@^@^@^@^@^@^@^@^A^@^B^@^@^@^@^@^@^@^@^@^@^@^@^@%s: %s^@MYSQL_AUDIT_GENERAL_ERROR^@OFF^@BOTH^@NO_AUTO_CLEAR^@NO_INTERNAL_LOOKUP^@Unknown^@tcp^@MYSQL_TCP_PORT^@/var/lib/mysql/mysql.sock^@MYSQL_UNIX_PORT^@Unable to delete pid file: %s^@%.3f^@.lower-test^@.LOWER-TEST^@Can't create test file %s^@Shutting down slave threads^@'--lc-messages-dir'^@--language/-l^@--binlog_max_flush_queue_time^@5.7.37^@Linux^@%s Ver %s for %s on %s (%s)
登录后复制
3. 重启服务
systemctl restart mysqld
systemctl status mysqldnetstat -nplt |grep mysqld
登录后复制
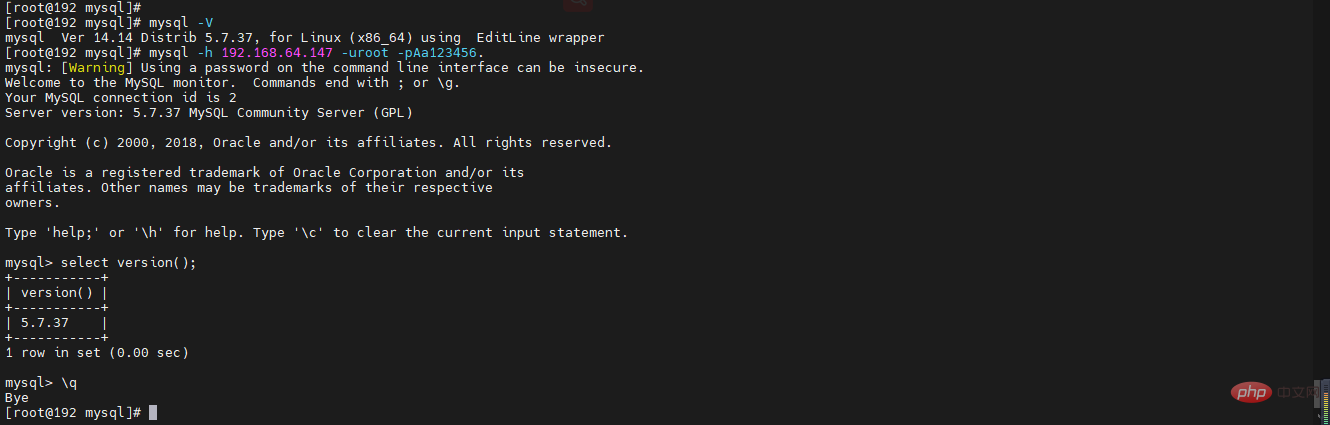
4. 确认版本
mysql -V
mysql -h 192.168.64.147 -uroot -pAa123456.
mysql> select version();mysql> \q
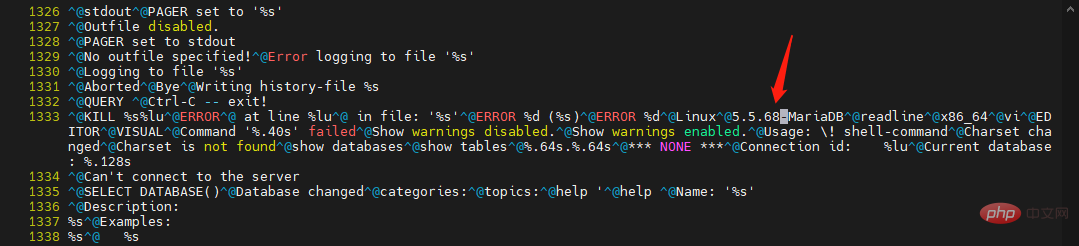
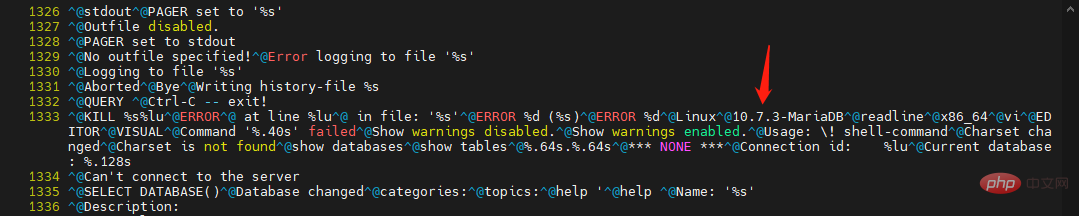
vi /usr/bin/mysql# 搜索关键字“-MariaDB”快速定位,修改版本号,建议改为官网最新的稳定版本^@KILL %s%lu^@ERROR^@ at line %lu^@ in file: '%s'^@ERROR %d (%s)^@ERROR %d^@Linux^@5.5.68-MariaDB^@readline^@x86_64^@vi^@EDITOR^@VISUAL^@Command '%.40s' failed^@Show warnings disabled.^@Show warnings enabled.^@Usage: \! shell-command^@Charset changed^@Charset is not found^@show databases^@show tables^@%.64s.%.64s^@*** NONE ***^@Connection id: %lu^@Current database: %.128s# 参考案例:^@KILL %s%lu^@ERROR^@ at line %lu^@ in file: '%s'^@ERROR %d (%s)^@ERROR %d^@Linux^@10.7.3-MariaDB^@readline^@x86_64^@vi^@EDITOR^@VISUAL^@Command '%.40s' failed^@Show warnings disabled.^@Show warnings enabled.^@Usage: \! shell-command^@Charset changed^@Charset is not found^@show databases^@show tables^@%.64s.%.64s^@*** NONE ***^@Connection id: %lu^@Current database: %.128s
登录后复制
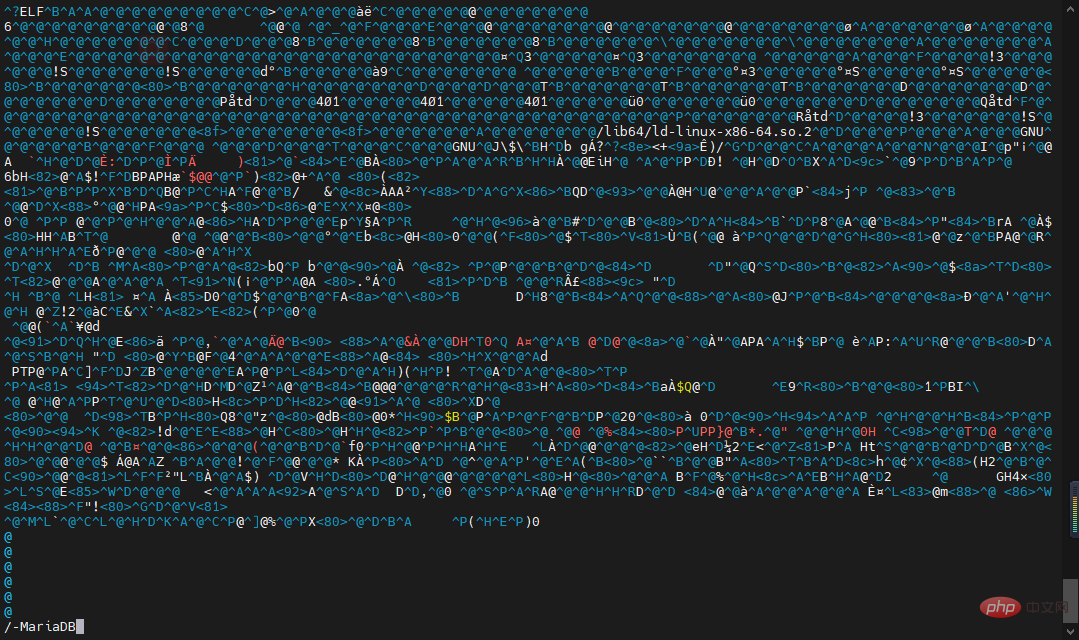
vi /usr/libexec/mysqld
# 同样通过搜索关键字“-MariaDB”快速定位,修改版本号,建议改为官网最新的稳定版本^@CLOSE_CONNECTION^@unauthenticated^@unconnected^@Error in accept^@5.5.68-MariaDB^@x86_64^@Linux^@%s Ver %s for %s on %s (%s)# 参考案例:^@CLOSE_CONNECTION^@unauthenticated^@unconnected^@Error in accept^@10.7.3-MariaDB^@x86_64^@Linux^@%s Ver %s for %s on %s (%s)
登录后复制
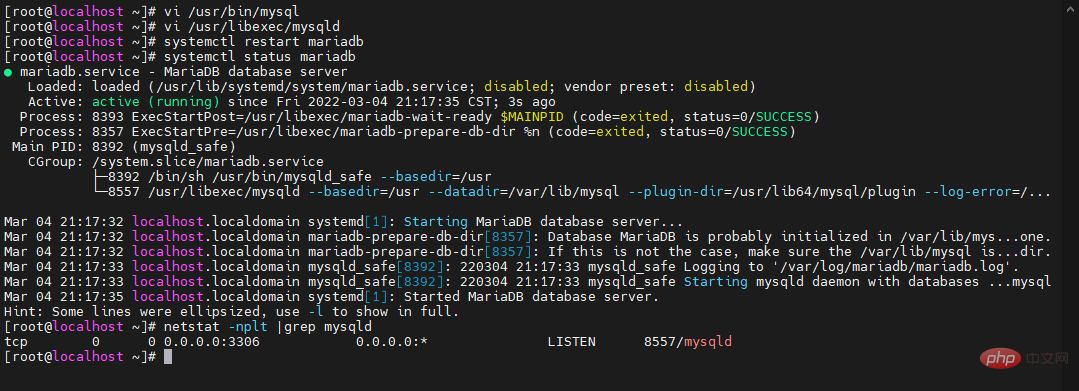
3. 重启服务
systemctl restart mariadb
systemctl status mariadbnetstat -nplt |grep mysqld
登录后复制
4. 确认版本
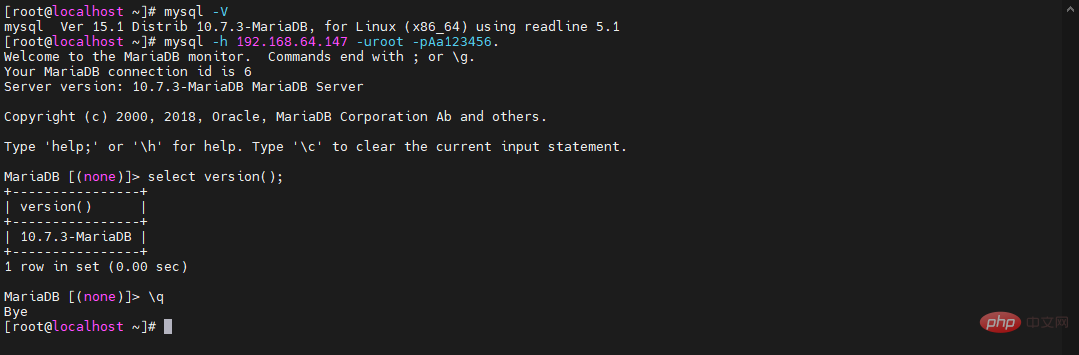
mysql -V
mysql -h 192.168.64.147 -uroot -pAa123456.
MariaDB [(none)]> select version();MariaDB [(none)]> \q
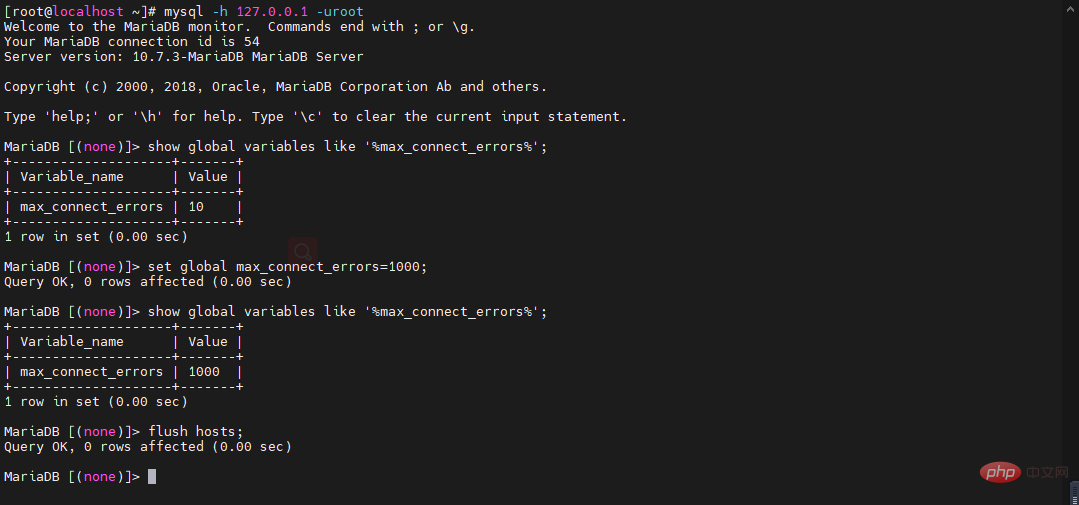
mysql -h 127.0.0.1 -uroot
MariaDB [(none)]> show global variables like '%max_connect_errors%';MariaDB [(none)]> set global max_connect_errors=1000;MariaDB [(none)]> show global variables like '%max_connect_errors%';MariaDB [(none)]> flush hosts;MariaDB [(none)]> \q